Effortlessly collect emails on your static site for free with make, formspark, and google sheets
Learn how to collect emails on your static website for free using Make, Formspark, and Google Sheets. Follow this simple step-by-step guide to automate the process and protect your forms from spam.
The Challenge with Email Collection on Static Sites
As developers and marketers, we’ve all faced that moment when we need to collect emails on a static website. Without a backend server, this seemingly simple task can become surprisingly complex. After years of building and optimizing websites for clients, I’ve developed a streamlined solution that avoids both unnecessary costs and technical headaches.
In this guide, I’ll show you how to build a professional email collection system using three powerful tools: Formspark, Google Sheets, and Make (formerly Integromat). This combination creates a robust pipeline that’s both cost-effective and spam-resistant - perfect for static sites built with frameworks like Astro, Hugo, or even plain HTML.
The Tool Stack: Why It Works So Well
Why Use Formspark?
Formspark stands out for static form handling with its generous free plan (500 submissions monthly) and robust spam protection. For growing businesses, their $25 plan covers up to 5,000 submissions monthly - significantly more affordable than alternatives like Formspree. What makes Formspark particularly valuable is its built-in defenses: reCAPTCHA integration, custom honeypot fields, and spam word filtering that work right out of the box.
Why Use Google Sheets?
Google Sheets offers the perfect balance between simplicity and power for data storage. It’s free, accessible to team members without technical knowledge, and allows for easy data manipulation. While I’ve successfully implemented similar workflows with Airtable or custom database solutions, Google Sheets remains the most straightforward option for most use cases.
Why Use Make?
Make (formerly Integromat) provides the automation glue with a surprisingly generous free tier. Unlike Zapier’s tight limits, Make gives you 1,000 operations monthly without spending a cent. This means you can connect your form to multiple destinations simultaneously - perhaps sending high-priority leads to Slack while maintaining your master list in Google Sheets.
Transparency note: I receive no commissions or incentives for recommending these tools. They’re simply the stack I’ve found most effective after implementing countless lead capture systems for clients.
Step-by-Step Implementation Guide
Creating Your Formspark Form
- Navigate to https://www.formspark.io/ and create a free account using Google, GitHub, or Slack for seamless access.

- After confirming your account, click “Create New Form” to begin the setup process.

- Name your form something descriptive (e.g., “Newsletter Signup”). This helps when you’re managing multiple forms.

- For the technology stack, select HTML (though Formspark works equally well with React, Vue, or other frameworks).

- Click “Create” to generate your form.

- You’ll now see your form’s unique action URL - this is what connects your HTML form to Formspark’s backend.

- Copy this action URL and add it to your HTML form. For example:
<form action="https://submit-form.com/your-unique-form-id">
  <input type="email" name="email" placeholder="Your email" required>
  <button type="submit">Subscribe</button>
</form>
Pro Tip: Need a ready-to-use HTML form styled with Tailwind CSS? I’ve created a starter template you can copy and paste.
Setting Up Spam Protection
Having built dozens of forms for clients, I’ve learned that unprotected forms quickly become spam magnets. Here’s how to implement multiple layers of protection:
-
Return to Formspark and navigate to your form’s “Settings” section.
-
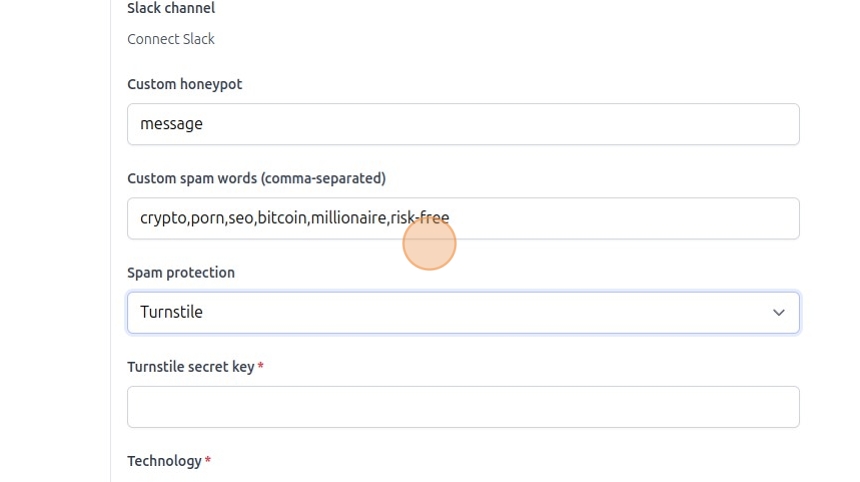
Set up a Custom Honeypot field. Honeypots work by creating invisible fields that humans won’t fill out, but bots will:

-
I recommend naming your honeypot something generic like “message” or “company” rather than “honeypot” or “spam_check”. Sophisticated bots often avoid fields with obvious honeypot names.
-
Enable and configure Spam Word Filtering. This powerful feature blocks submissions containing known spam triggers:

-
I typically add keywords like: “crypto,porn,seo,bitcoin,millionaire,risk-free” to catch the most common spam content.
-
Select “Block submissions containing spam words” to prevent these messages from reaching your system.

- After setting up both protections, click “Save” to implement your changes.

Adding CAPTCHA Protection (Optional But Recommended)
For high-traffic sites, I recommend adding an additional CAPTCHA layer. If you’re hosting on Cloudflare (as many static sites do), Turnstile offers the perfect balance between security and user experience:
- In Formspark, navigate to your form’s CAPTCHA settings:

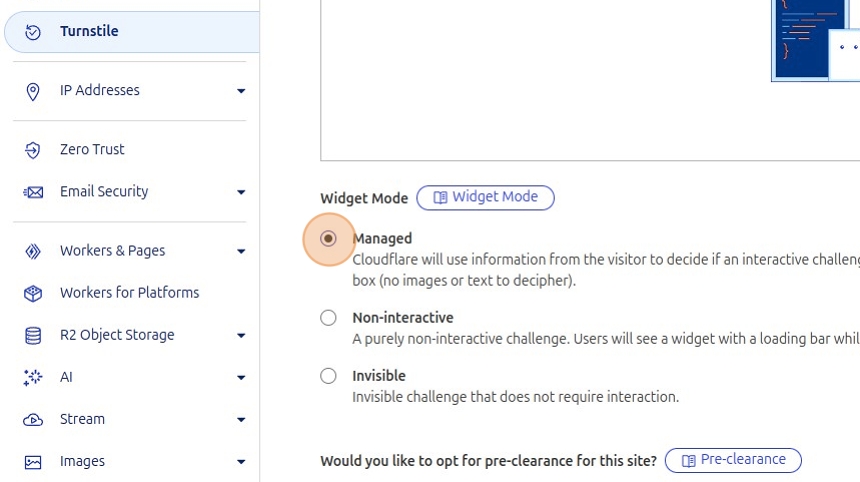
- Log into your Cloudflare account and navigate to the “Turnstile” section:

- Click “Turnstile” and then “Add widget” to create a new CAPTCHA:

- Give your widget a descriptive name that helps you identify which form it belongs to:

- For most forms, the default “Managed” option works perfectly:
- Add your domain as an allowed hostname. Note that your domain must already be added to Cloudflare:

- Enter your domain and create the Turnstile widget:

- Create your Turnstile keys, which connect your form to the CAPTCHA service:

- You’ll get two keys: the Site Key (for your frontend form) and the Secret Key (for Formspark’s backend):

Implementation Detail: For testing during development, you can use Turnstile’s test keys instead of creating real ones.
- Add the Turnstile widget to your form by inserting this code above your submit button:
<div class="cf-turnstile" data-sitekey="YOUR_SITE_KEY"></div>
<script src="https://challenges.cloudflare.com/turnstile/v0/api.js" async defer></script>- Go back to Formspark settings, select “TURNSTILE” as your CAPTCHA provider, and paste your Secret Key:
- Paste your Secret Key and save your settings:

Enhancing User Experience (Optional)
You can further refine your form’s behavior with these user experience improvements:
- Set up a custom redirect URL to send users to a thank-you page after submission:

-
Customize confirmation email subjects to help users identify your communications.
-
Test your form by submitting a sample entry and checking the Formspark dashboard:

Connecting Formspark to Google Sheets
Now for the integration part - sending your form submissions directly to a spreadsheet:
- Sign in to Make (formerly Integromat) or create a free account:
- Install the Formspark integration (direct link: Formspark on Make):

- Select your organization and install the integration:

- Complete the installation:

- Return to the Make dashboard:

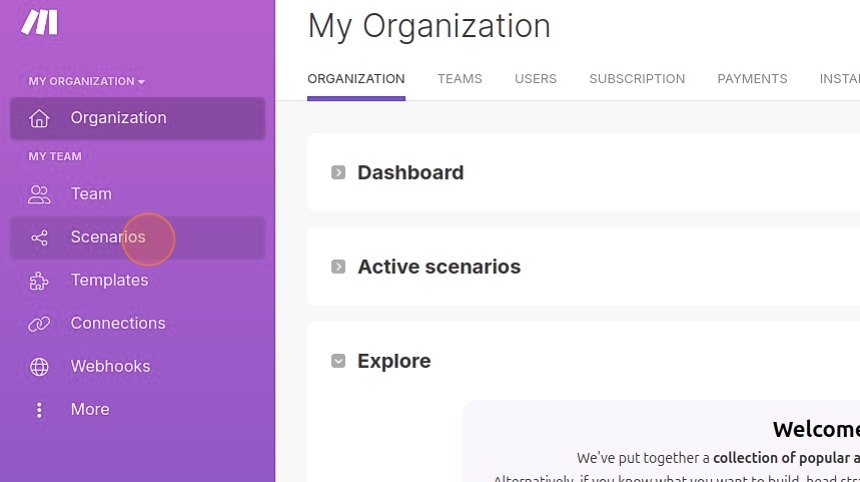
- Navigate to “Scenarios” to create a new automation:

- Create a new scenario:

- Add a new module to your scenario:

- Search for and select the Formspark app with the “New Submission” trigger:

-
Select “New Submission” to trigger the workflow when someone submits your form:*

-
Create a webhook to receive form data by clicking “Create a webhook” and saving:

- Copy your newly created webhook URL:

- Return to Formspark’s settings for your form:

- Paste your webhook URL in the “Webhook URL” field:

- Save your changes:

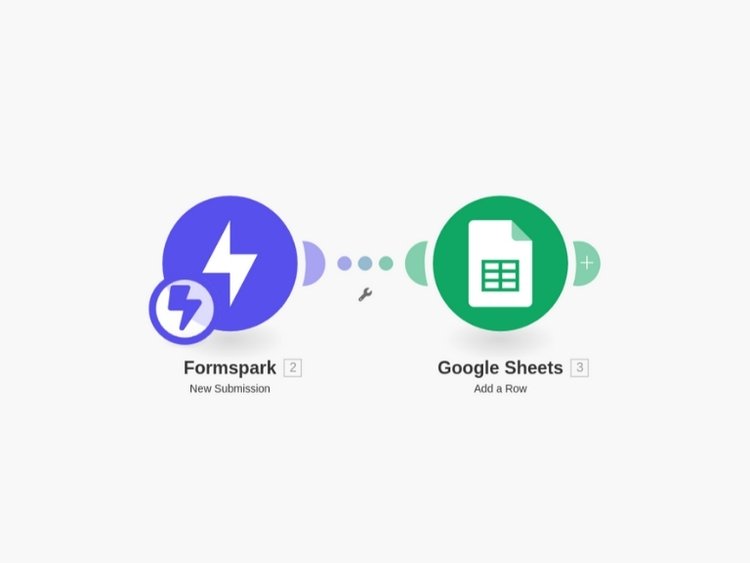
- Back in Make, add a second module to handle Google Sheets integration:

Pro Tip: Before this step, create a Google Sheet with headers matching your form fields (e.g., “Name”, “Email”, “Message”). This structure ensures your data maps correctly.
- Search for Google Sheets and select the “Add Row” action:

- Create a new Google Sheets connection:

- Authenticate with Google by clicking “Sign in with Google”:

- Your Google Sheet should be prepared with appropriate column headers:

- Select your Google Sheet by clicking “Click here to choose file”:

- Browse and select the spreadsheet where you want to store submissions:

- Select the specific sheet tab within your spreadsheet:

-
Important Note: At this point, you’ll need to submit a test form entry to populate the form fields in Make. Until you have sample data, Make won’t know which fields to map.
-
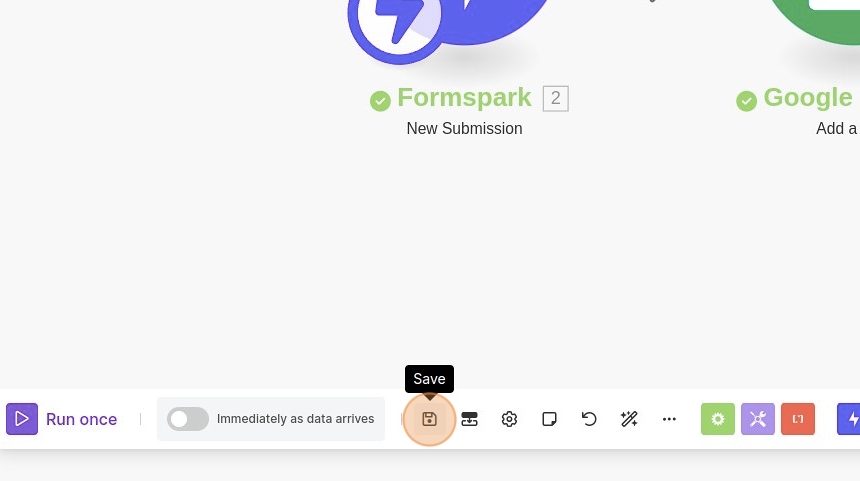
Save your module configuration:

- Save your entire scenario:

-
Critical Step: Submit your form to generate sample data for field mapping.
-
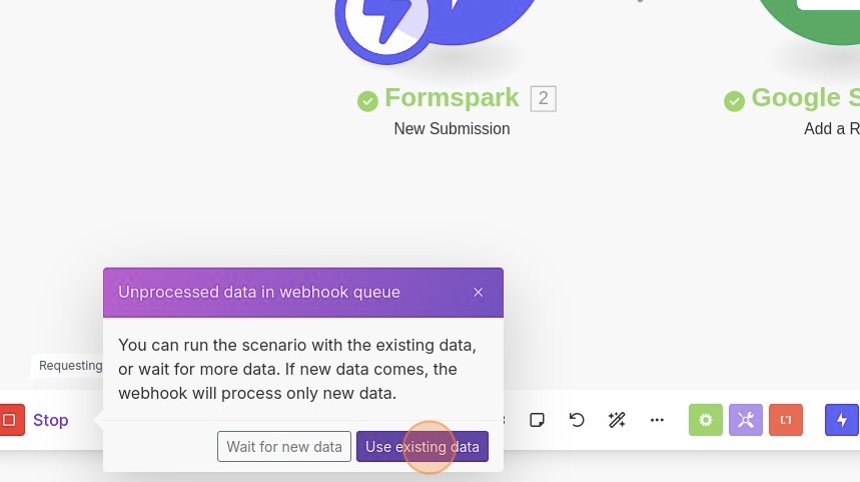
After submitting a test entry, run your scenario once to process the submission:

- Use existing data to visualize the data flow:
- Now you can map form fields to Google Sheet columns. These will automatically appear once you have test data:

- Confirm your field mapping and click “OK”:

- Save your final configuration:
- Activate your scenario to make it live:

- You’ll be asked if you want to process existing data. This lets you choose to add your test submission to Google Sheets immediately:

- That’s it! Your system is now fully operational. Test it with a real submission, and you’ll see the data appear automatically in your Google Sheet:

Beyond the Basics: Advanced Configurations
Once you have your basic setup working, consider these advanced integrations:
Email Notifications
Configure Make to send you an email whenever a new form submission arrives. This is especially useful for time-sensitive inquiries.
Slack Notifications
Add a Slack module to push high-priority leads directly to your team’s channel, ensuring immediate follow-up. I’ve found this particularly effective for sales-oriented forms.
Conditional Logic
Use Make’s filtering capabilities to route different types of submissions to different destinations based on form field values. For example, you might want support requests to go to your help desk system while partnership inquiries reach your business development team.
CRM Integration
Connect your form to systems like HubSpot, Salesforce, or Pipedrive to automatically create contacts and deals from form submissions. This creates a seamless lead capture pipeline.
Why This Setup Outperforms Alternatives
After implementing countless form solutions over my career, I can confidently say this approach offers the best combination of:
- Cost-effectiveness: The entire setup can be run for free or very low cost compared to all-in-one form solutions.
- Flexibility: Each component can be replaced or upgraded independently as your needs evolve.
- Spam resistance: The multi-layered protection approach stops even sophisticated bots.
- Ownership: Your data lives in your Google Sheet, not locked in a third-party platform.
- Performance: Since the form submission process is extremely lightweight, it won’t slow down your static site.
Conclusion: Form Handling Doesn’t Have to Be Complex
Collecting emails on static sites has historically been a pain point that drove many developers toward heavier CMS solutions. With this approach, you can maintain the speed and simplicity of a static site while adding robust form functionality.
The beauty of this system lies in its simplicity: users interact with a clean HTML form, their submissions flow through Formspark’s secure handling, and Make quietly routes that data to your Google Sheet - all without requiring a traditional backend server.
For more automation ideas and technical insights, check out my related guides on setting up n8n for powerful automation workflows and creating professional flowcharts in minutes.

Have questions about this setup or need help with a specific integration? Feel free to reach out - I’m always happy to help fellow builders overcome technical challenges.